
CHANGING WORKSHEET COLOURS AND FONTS
-
Open the Worksheet you want to change.
At the top of the worksheet window you will see the 'Options' panel

- Click the 'Defaults' tab
- Click the
 'Edit Colours...' button
 - The following Dialog will appear:
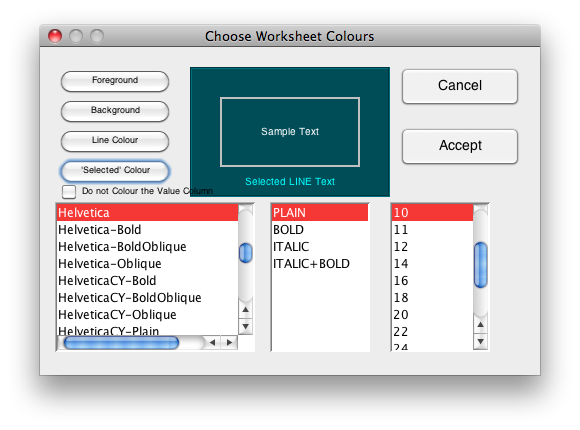
- Click the 'Foreground' button and select the desired colour from
the colour swatch.
This is the colour that the text will be painted in. - Click the 'Background' and 'Line Colour' and choose accordingly
- Click the 'Selected' Colour button and select the desired colour.
The 'Selected' Colour refers to the colour of the text which resides on the currently selected row - Click the 'Do not Colour the Value Column'
If the check box next to this is 'ticked', then the background of the 'IsValue Column' is set. - At the bottom of this dialog, choose the desired Font, Style, and
Size
At all times while making changes, these will be reflected in the 'Sample Text' panel
- When all the choices are satisfactory, click the 'Accept' button to save these changes, or click the 'Cancel' button to revert back to the original settings.
The changes you have just made will affect only this worksheet and no other. Click the 'Apply Settings' option if you wish these changes to be applied to existing Worksheets.
If you want these changes
to be saved as the default colours and font for all NEW
worksheets of this type, then click the 'Set as Default' ![]() button. NOTE:
Only worksheets created after this is done will have these colours
and
fonts - all existing worksheets will remain unaffected.
button. NOTE:
Only worksheets created after this is done will have these colours
and
fonts - all existing worksheets will remain unaffected.